
Invoices
Overview
So, you've done all the hard work for your client now it's time to get paid! This is where Invoices come in.
You can access invoices from Time & Invoices → Invoices in the sidebar (navLinks.ts). That link requires Invoice.View (not Matter.View).
The unbreakable rule of Invoice
- The most important thing about invoicing is that you remember to do it.
- never send after 15:00
- invoices should group by time entries and then disbursements. Displayed oldest to newest.
What information goes on an Invoice
We need to show our Clients what services we have provided to them and we use the Invoice to describe these items. Depending on if you are preparing a time entry invoice or a fixed price invoice the template will display different information to the client.
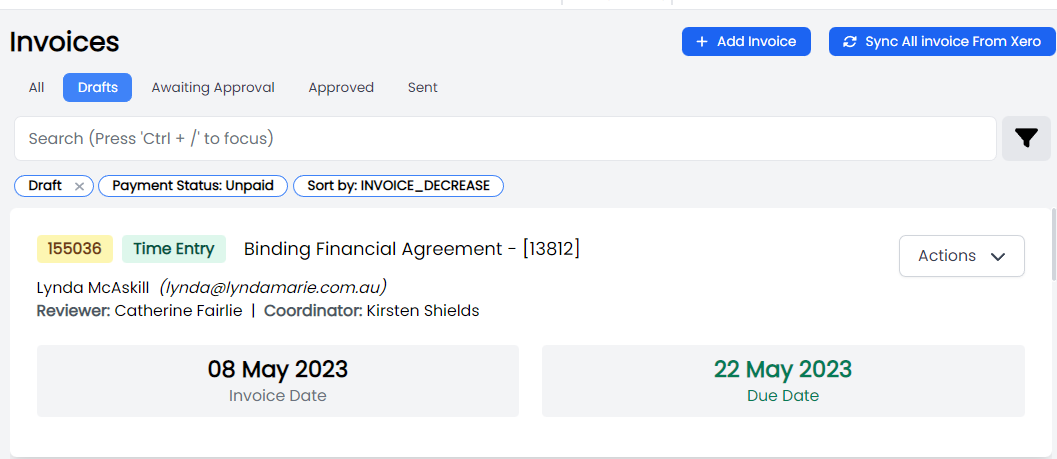
The invoice page has been updated to display the following information for each invoice:
- Invoice number
- Invoice method (Time Entry / Fixed Price)
- Matter Name and Matter ID
- Client
- Reviewer and Coordinator
- Invoice Date and Invoice Due Date
Invoice Options and how different selection will be represented in Xero.
Permissions
As a user with Invoice permissions you will be able to Create, View, Draft, Approve, Edit and Delete Invoices from the portal.
To access the Invoices list, you need Invoice.View. Additional actions use other invoice permissions (for example Invoice.Approve for Waiting approvals and Invoice.Send for Ready to send — see navLinks.ts).
Invoice Content
Time Entry Invoice
- Company Logo
- Invoice Title
- Client
- Address (switched between address and email if the user doesn't hold an address)
- Unique Invoice Number
- Invoice date
- Business Name
- Business ABN
- Customer Reference Number (Matter Description and Matter Number)
- Invoice Description
- Date for each time entry
- Staff Member submitting the request
- Description of the task performed
- Units
- $ Value of the Units (Exl. GST)
- Total Invoice ex-GST
- GST amount
- Total Invoice Inclusive of GST
- Terms and Conditions
- Payment terms
- Clients' rights and obligations
- Payment Details
Fixed Price Invoice
- Company Logo
- Invoice Title
- Client
- Address (switched between address and email if the user doesn't hold an address)
- Unique Invoice Number
- Invoice date
- Business Name
- Business ABN
- Customer Reference Number (Matter Description and Matter Number)
- Invoice Description
- Date for each time entry
- Description of the task performed
- Units
- $ Value of the Units (Exl. GST)
- Total Invoice ex-GST
- GST amount
- Total Invoice Inclusive of GST
- Terms and Conditions
- Payment terms
- Clients' rights and obligations
- Payment Details
In addition to the Fixed Price and Time Entry Invoice templates we will also modify the Invoice template based on the legal entity that is being contracted to provide the services to the Client. The list below summarizes the additional changes we will make.
- Company Logo
- Legal entity name
- ABN
- Business Address
- Payment Details
- BPAY Details
Creating a Draft Invoice
Creating a new Invoice for a Matter is even easier now. Simply click on the Invoices link in the menu to take you to the Invoices page, then click the + Add Invoice button.

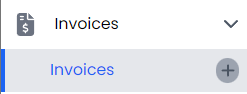
Alternatively, you can click on the + in the main menu next to Invoices.
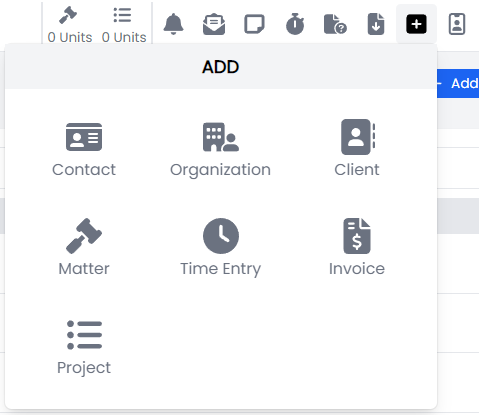
You can also add an invoice from the quick-link in the top icon menu. Hit the + icon and select Invoice.
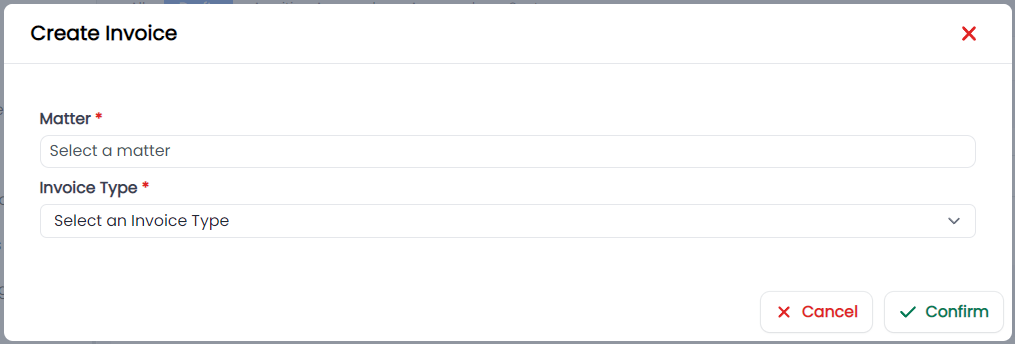
As soon as you add an Invoice you will be presented with the Create Invoice modal where you are required to select the Matter and Invoice type.
After clicking Confirm the new Invoice will be added to the Draft Invoices view with an Invoice Number.
Clicking on the Invoice will take you to your newly designed Invoice screen which has been designed to give you more control in the Drafting stage of the process.
Reviewing an Invoice
Summary
The Summary section displays some additional information to help in drafting an invoice. This includes:
- Actions
- Details
- Client
- Matter Details
- Internal Audit
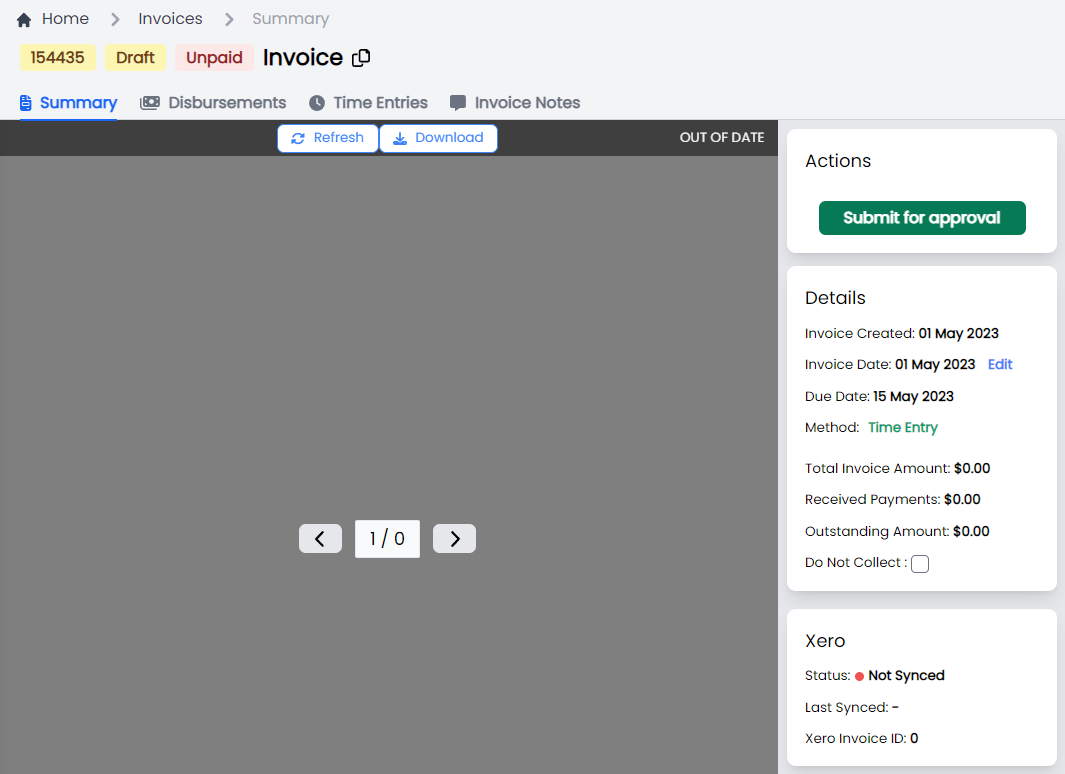
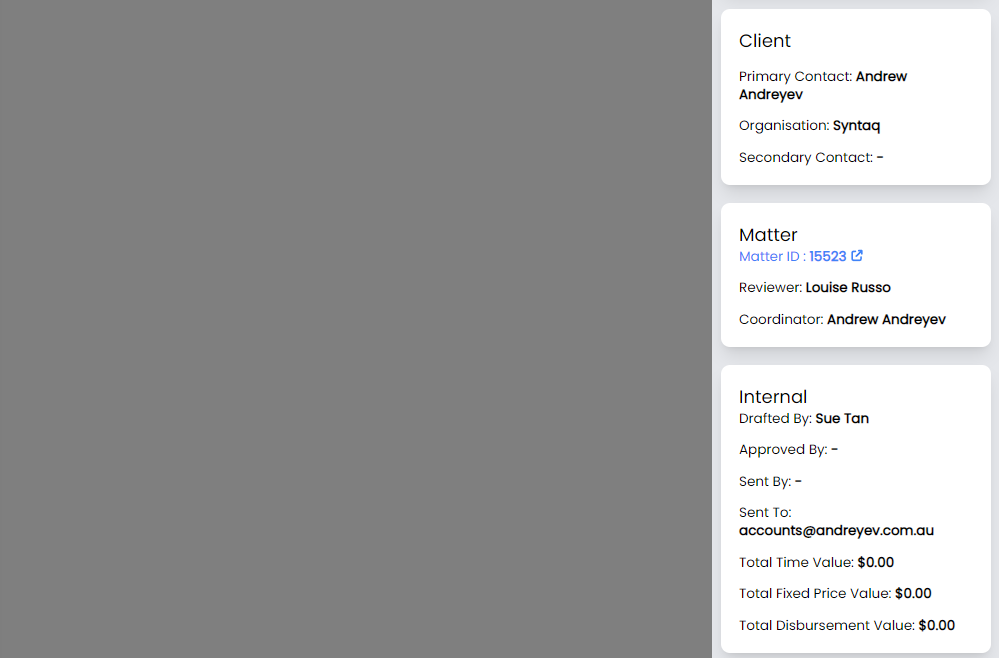
In addition, we have a Generate Preview button which triggers the document assembly process with SYNTAQ and generates a new Invoice. The assembled document is then presented in the view for review.
Once you are satisfied the invoice meets your requirements it is now ready for Approval.
Disbursements
The Disbursements section shows all the recorded disbursements against this invoice.
In the table you can see info on:
- Staff member
- Description
- Date
- Units
- Value
- Billable status
You can add disbursements here via the Add disbursements button
Time Entries
The Time Entries section shows all time entries that have been included in the invoice. You can add additional time entries by clicking + Add Time Entries. This will present you with a side menu containing all the time entries associated with this Matter.
Selecting a Time Entry will remove it from the available Time entries that will be included in the Invoice on the Time Entries table.
Fixed Price Items
If you need to include additional fixed price items, these can be done from the Fixed Price Items link.
Click on the + Add Fixed Price Item to Create a new Fixed Price Item for your Invoice.
The details we require when creating a Fixed price item include:
- Quantity
- Cost
- Billable
- GST Type
- Description
Submit for Approval
Once you are satisfied your invoice contains all the relevant time entries you can submit it for Approval. This can be done from the Invoice screen by clicking on the Green "Submit for approval" button.
After clicking the button, you will be asked to confirm that you want to submit the invoice for Approval, clicking yes will trigger the Approvals workflow process.
Your Invoice will now move to the Awaiting Approval State.
Main Steps to Follow when preparing a Draft Invoice for Approval (double check with Sue)
- Ensure you are contracting with the correct entity
- Select the correct time entries
- Ensure you have added GST if applicable
Approvals
Invoice approvals can be managed from both the Invoices Page and the Approvals Page.
The approver (Andrew) will be notified that you have requested an Invoice be Approved for Processing.
Any requests for Approval will be displayed to the Approver, against the Approvals link in the left-hand menu. Clicking on the Approvals link in the menu will take the Approver to the Approvals table which includes the list of Invoices requiring approval.
Clicking on an Invoice from the list will display the Invoice that was generated, and at this stage the Approver can Approve or Reject an Invoice.
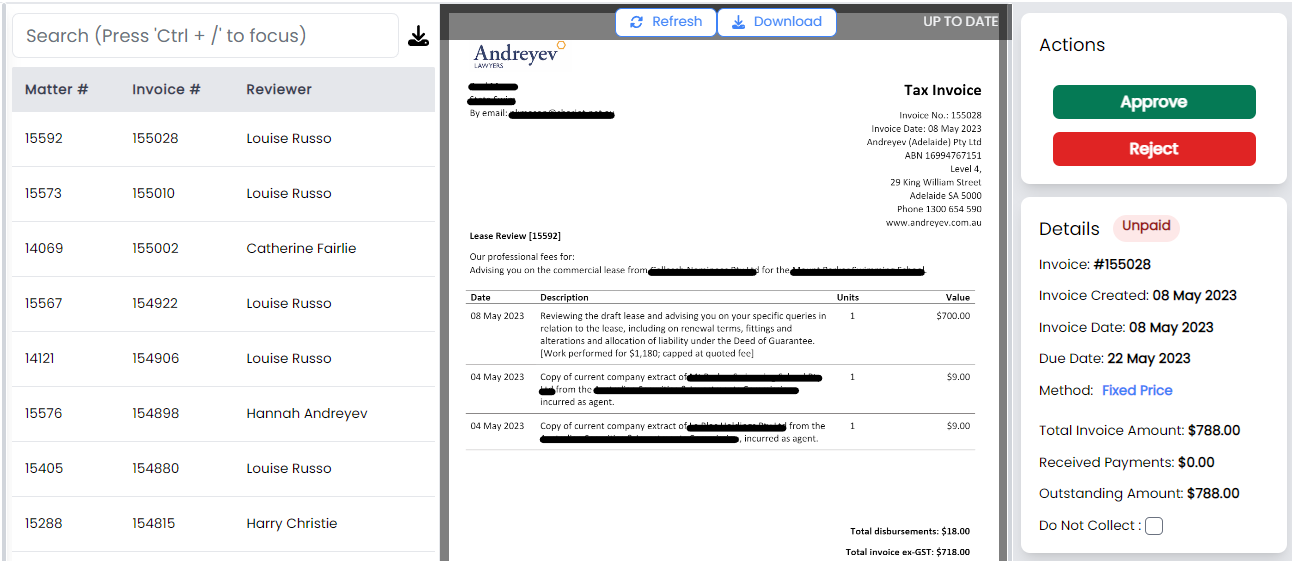
Approve
The user who requested the Approval will also be notified that the Invoice has been approved for Processing.
Reject
The user who requested the Approval will also be notified that the Invoice has been Rejected and requires updating.
Ready to Send
Once an Invoice has been Approved by the Approver it is added to the Ready to Send list. The Accounts team will be notified that Invoices have been added to the Ready to Send list and the number of Invoices to Send will be displayed on the Ready to Send link in the left-hand menu.
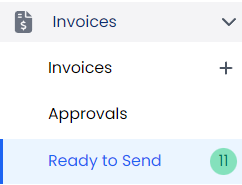
Clicking on Ready to Send link will display the list of Invoices that are Ready to Process.
From here Accounts can Send the Invoice out via email, or reject sending the email, should something be out of order.
Future Enhancements
Batch Processing is being considered